The Hidden Dirt Under Old Faucets: How to Replace Yours in Under an Hour
Most homeowners never inspect the space directly beneath an aging kitchen faucet until catastrophic dripping forces an intervention. What sits concealed under that broad chrome trim is rarely just hard water scale. Beneath the wide deck plate of an aging sink rests a compressed colony of mineral salts, rancid grease, decomposing gaskets, and black biofilm. Trapped moisture turns the boundary between stainless steel and brass into an anaerobic decay zone. According to a comprehensive bobvila.com Report evaluating market hardware for 2026, modern residential units increasingly prioritize integrated top-mount assemblies that eliminate these grime pockets entirely. Swapping out a failed fixture solves the aesthetic problem, but doing the job properly also eliminates a long-standing source of contamination.
📌 Key Takeaways:
- The Hygiene Reality: Decaying rubber gaskets and degraded sealant under old deck plates harbor aggressive microbial colonies that corrode mounting holes.
- Mechanical Clearance: Restricted garbage disposal clearance and frozen compression fittings represent the primary hurdles during fixture removal.
- Modern Fastening: Contemporary designs have moved away from seized under-sink nuts in favor of top-mount collars and pre-crimped water supply lines.
The Microbial Sludge Hidden Beneath Aging Deck Plates
Surface cleaning rarely touches the mechanical perimeter of an active sink. Every time soapy water splashes against the spout base, surface tension draws microscopic food particles, vegetable oils, and dish detergents under the rim. If the original installer relied on standard foam gaskets rather than a continuous bead of quality sealant, those cellular foams act as sponges. They absorb graywater and never dry out.
After five to ten years, opening that junction exposes a ring of foul, sulfurous sludge. The rubber decomposes into a tar-like residue that adheres to the countertop finish. If the counter is natural granite or marble, trapped acids leach minerals from the stone, leaving permanent dull rings called etches. On stainless steel, the anaerobic environment strips the protective chromium oxide film, creating micro-pitting rust. Stripping the fixture entirely is often the only way to arrest this corrosion and restore sanitary conditions around food preparation areas.
Diagnostic Prep: Shut-Off Valves and Under-Sink Clearance
Plumbing jobs rarely go sideways at the faucet; they fail at the wall. Beneath the basin sit two dedicated stops: one for hot, one for cold. In homes older than fifteen years, these are typically multi-turn gate valves with internal neoprene washers that dry rot over time.
Turn the oval handles clockwise. If they resist, do not force them with heavy pliers. Applying excessive torque to a frozen brass stem can shear the packing nut, triggering an immediate pressurized flood. If the valves do not close smoothly with hand pressure, shut off the residence's main water meter before proceeding. Once the valves close, open the faucet handles completely. Relieve line pressure. Verify that water stops flowing entirely. A steady trickle indicates valve bypass, meaning the shut-off valve itself requires replacement before you disconnect the fixture.
Next comes spatial management. A standard under-sink cabinet is crowded with drain traps, pull-out organizers, and filtration systems. The biggest obstacle is almost always garbage disposal clearance. A high-horsepower disposal occupies the prime center space directly beneath the faucet deck. In roughly 40% of residential retrofits, dropping the disposal unit off its mounting ring saves significant time. That three-minute disconnect provides unobstructed access to the rear wall and eliminates bruised forearms.
| Mounting Architecture | Clearance Requirement | Average Removal Window | Primary Mechanical Vulnerability |
|---|---|---|---|
| Legacy Dual-Handle (3-Hole) | 8, 12 inches vertical depth | 45, 90 minutes | Corroded brass locknuts seized against rusted steel washers. |
| Single-Handle with Deck Plate | 6, 8 inches behind basin | 25, 40 minutes | Sludge bridging the 3-hole base; calcified mounting nut. |
| Modern Top-Mount (Single-Hole) | Minimal under-sink access | 15, 20 minutes | Overtightened hex screws stripping the retention bracket. |
Extracting Corroded Fasteners Without Damaging the Basin
Disconnecting old water supply lines comes first. Use an adjustable wrench on the shut-off valve body while turning the line nut counterclockwise with a second wrench. Backing up the valve body prevents you from twisting the copper stub-out inside the drywall. Keep a shallow pan underneath to catch the cup of stagnant water trapped inside the vertical flexible risers.
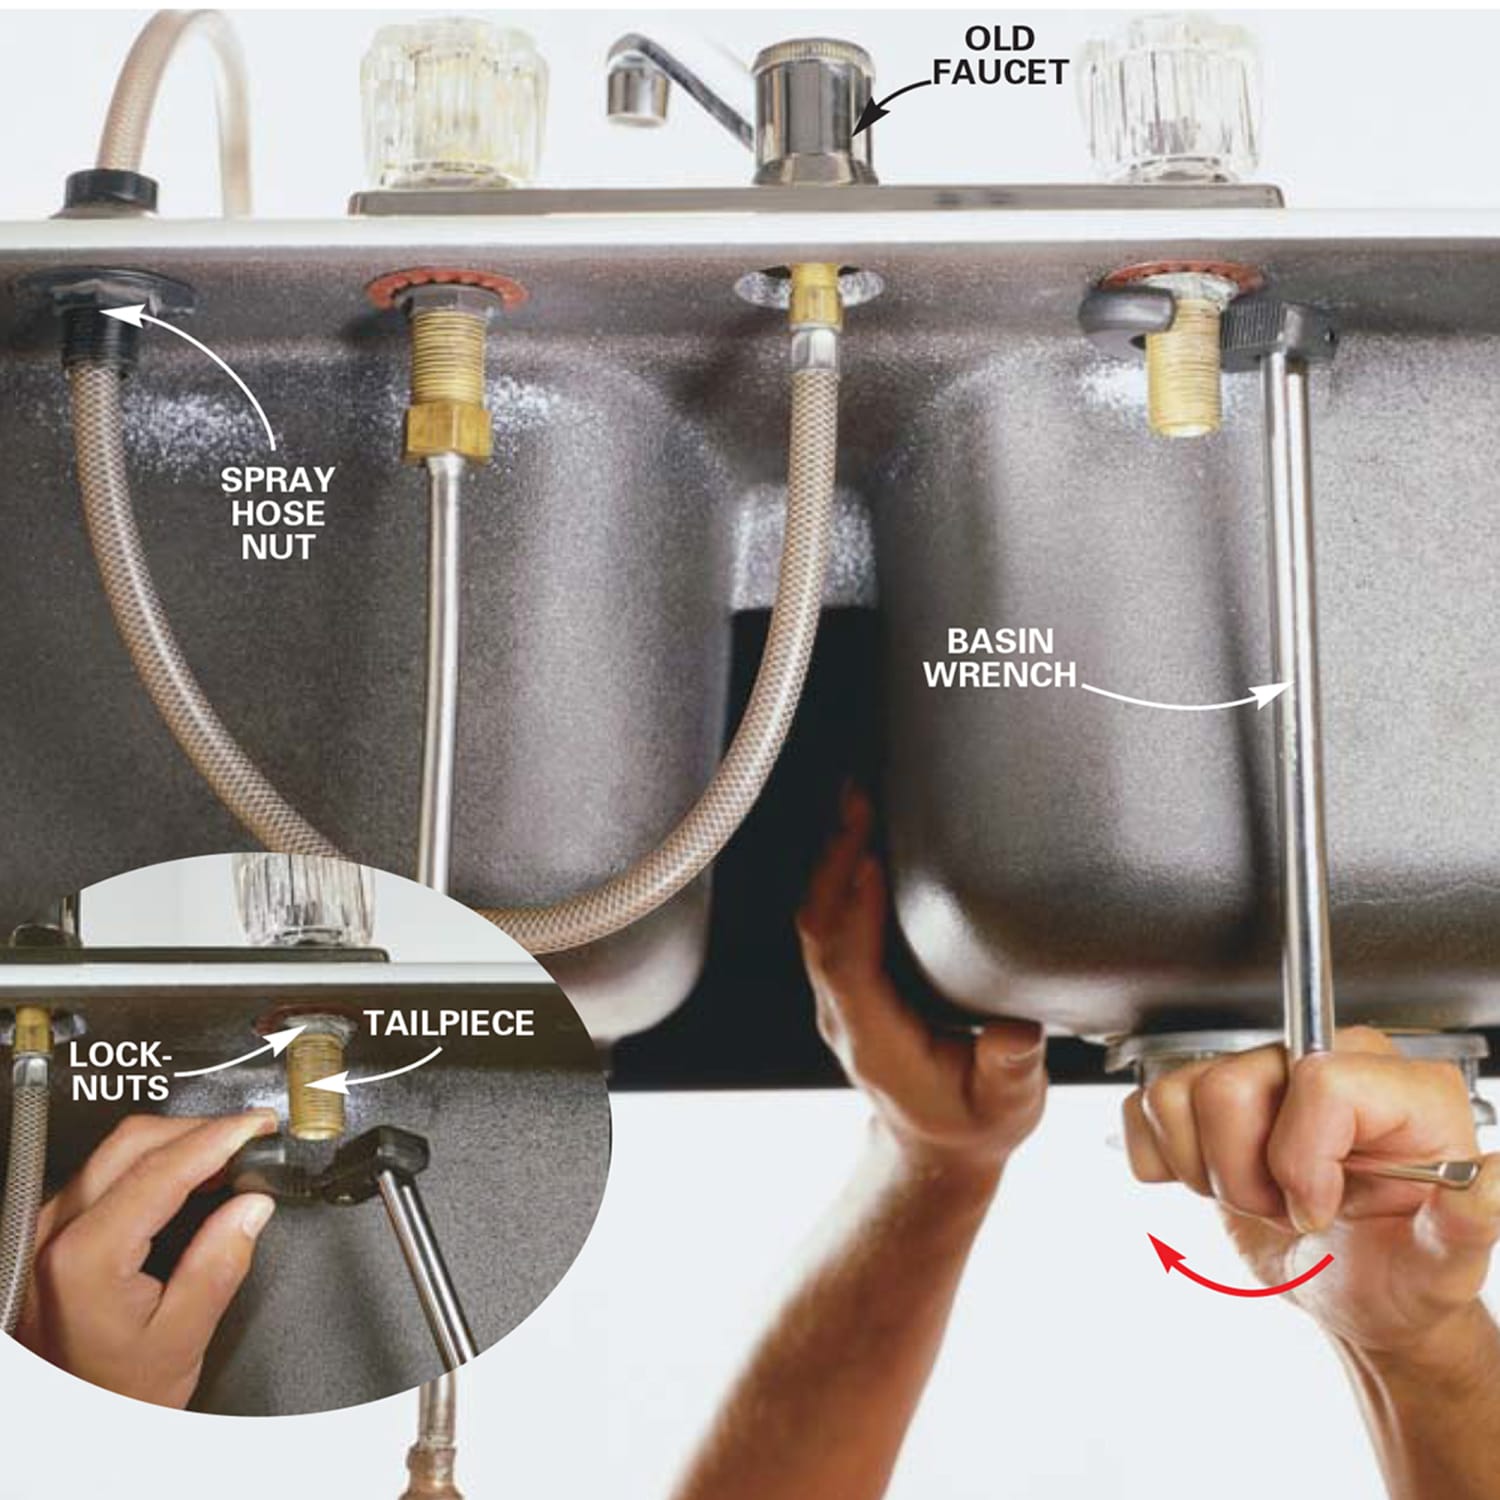
The true bottleneck of kitchen plumbing is reaching the central mounting nut. Tucked in the dark space between the back of the sink bowl and the cabinet wall, this nut is usually unreachable with conventional socket wrenches or slip-joint pliers. You need a basin wrench. This specialized tool features a spring-loaded, swiveling serrated jaw mounted on a long shaft, allowing you to grip fasteners from underneath while turning the handle below.
Mineral scale frequently welds this nut to the threaded shank. If thirty seconds of firm pressure fails to break it free, stop pulling. Tearing at seized plumbing can deform thin-gauge stainless steel basins or crack undermount adhesive seals. Coat the threads with a high-creep penetrating fluid. Allow it to sit for fifteen minutes. If the hardware still resists, a compact oscillating multi-tool fitted with a carbide metal-cutting blade can slice through the brass retaining collar in seconds without marking the countertop.
Selecting the Architecture: Single-Handle vs Dual-Handle Dynamics
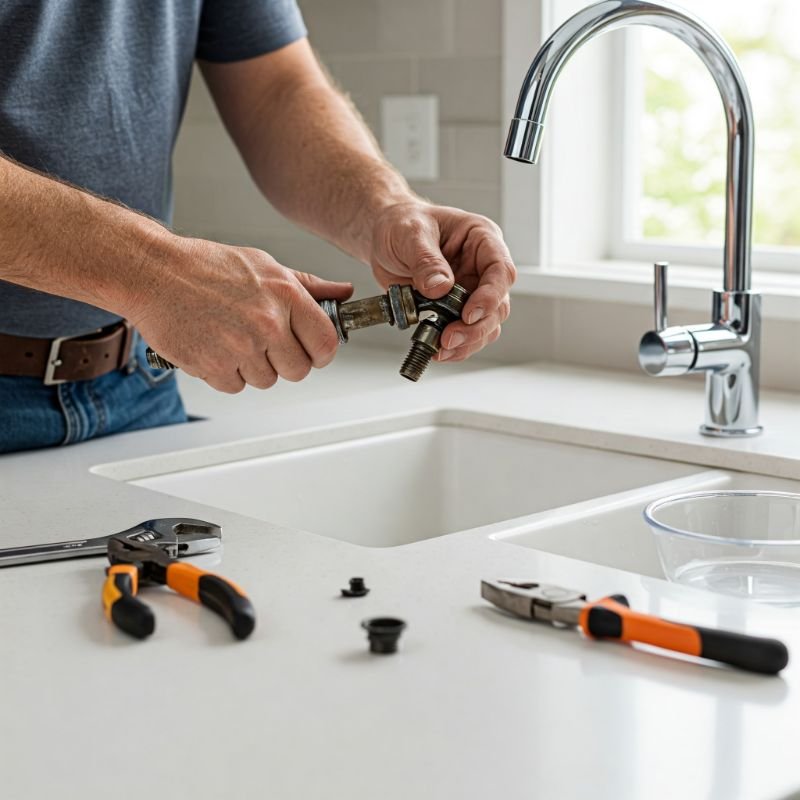
Sink configurations generally offer one, three, or four prep-drilled holes. Traditional layouts separated hot and cold valves, demanding a three-hole footprint, often paired with an independent side-sprayer hole. Modern kitchens overwhelmingly lean toward single-handle operations that consolidate flow and temperature control into one lever.
When transitioning from a multi-hole pattern to a single-hole faucet, homeowners face a choice. You can install an escutcheon, commonly known as a deck plate, which spans roughly 10.5 inches to hide the outer holes beneath a single decorative metal base. Alternatively, you can abandon the wide plate entirely. Leaving individual holes open allows you to fill them with functional accessories: a built-in liquid soap dispenser, an air gap for dishwashers, or a dedicated reverse-osmosis filtration tap. Testing published by Better Homes & Gardens in 2026 highlights that ditching broad deck plates cuts long-term cleaning maintenance considerably, as individual post-mount fixtures collect far less trapped water along their perimeter.
Decontaminating the Deck and Setting the New Assembly
Once the old fixture is in the recycling bin, the dirty restoration begins. Use a plastic razor blade or a nylon scraper to shear away the fossilized ring of calcified deposits. Never scrape a stone or porcelain deck with hardened steel blades, which gouge glazed surfaces and leave stubborn metallic marks. Dissolve stubborn scale using a rag soaked in warm sulfamic acid or cleaning-grade white vinegar. Wipe the perimeter down with isopropyl alcohol to remove lingering grease.
Sealing the new installation requires careful material selection. For decades, plumbers rolled ropes of plumber's putty beneath the faucet base. That technique is now outdated for modern composite, quartz, and natural granite surfaces. Putty contains vegetable or petroleum oils that leach into natural stone pores, leaving indelible grease halos. Instead, inspect the new faucet for an integrated silicone base gasket. If none is supplied, run a narrow bead of clear 100% silicone sealant beneath the rim or deck plate.
Drop the assembly through the hole, aligning it visually with the sink divider. Thread the mounting nut over the bundled lines underneath. Hand-tighten it up to the base washer, confirm the spout sits squarely aligned from above, then lock it securely with the installation collar or basin wrench. Snug is sufficient; over-torquing can buckle composite materials.
Routing the Sprayer and Locking Compression Fittings
Pull-down kitchen designs route water through a flexible pull-down sprayer hose running straight through the spout neck. To keep operation smooth, install this hose carefully. Feed the hose down through the body, click it into the outlet manifold using the manufacturer's quick-connect clip, and install the lead-free counterweight. Position the weight on the upward run of the hose loop, roughly two inches above the curve. Ensure it glides smoothly without catching on drainage pipes, shut-off valve stems, or the garbage disposal housing.
Connect the integrated water supply lines to the wall stops. Modern fixtures feature built-in PEX lines terminating in 3/8-inch female compression fittings. Align these square to the brass threads. Hand-thread the nut to avoid cross-threading. Once finger-tight, brace the valve body with one wrench and advance the nut one full turn using a second wrench. Compression ferrules do not require plumber's tape or pipe thread sealant; the metal-to-metal contact seals the joint under pressure, and chemical pastes can actually lubricate the threads enough to cause over-tightening and leaks.
Flushing the Core Lines and Restoring Velocity
Do not immediately operate the new spray wand under normal pressure. Manufacturing lines, packaging, and household copper pipe cuts all shed tiny particles of debris. If you turn on the water with the spray head attached, those fragments rush into the delicate flow restrictors and check valves, clogging the internal diaphragms.
Unthread the spray head completely from the hose. Place the bare hose end in a tall bucket or hold it firmly down toward the drain. Open both wall stops fully. Move the faucet handle to full cold for 30 seconds, then push across to full hot for an equivalent window. This purges air pockets, dislodges trapped copper scale, and flushes flux residues out of the line.
Inspect every under-sink connection while the line runs at full volume. Use a dry paper towel to wipe the compression fittings, the hose quick-connect, and the shut-off valve packing nuts; drops of water show up instantly on paper. Once verified leak-free, reattach the spray head. Routine aerator cleaning every six months, soaking the screen in mineral descaler, will keep the stream smooth and prevent backpressure within the pull-down assembly.
Frequently Asked Questions (FAQ)
Q1: Why should plumber's putty be avoided on granite or quartz countertops?
A1: Plumber's putty is formulated with oils that seep into porous natural stone and quartz resin matrices. This migration causes permanent, dark staining around the base plate. Always use 100% silicone sealant or the manufacturer's engineered rubber gasket for stone installations.
Q2: How do you free a rounded, rusted mounting nut when a basin wrench slips?
A2: When mineral corrosion rounds off the nut, soak the fastener in penetrating lubricant for 20 minutes. If it still refuses to turn, cut vertically through the brass nut using an oscillating multi-tool fitted with a bi-metal blade, or use a dedicated nut-splitter to break the collar without stressing the sink basin.
Q3: Is thread seal tape necessary on 3/8-inch compression supply lines?
A3: No. Compression fittings seal via the mechanical wedging of a beveled brass ferrule against the valve seat. Applying thread seal tape or pipe dope to the threads prevents the nut from torquing to its proper depth, which frequently induces slow leaks rather than preventing them.
Maintaining Water Purity and Mechanical Integrity for the Future
A successful faucet installation does more than cure an annoying drip; it eliminates an active pocket of hidden bacterial decay and prevents slow structural water damage inside cabinetry. Modern modular fixtures make the physical swap manageable for anyone with basic mechanical confidence, provided you treat isolation valves and line flushing with precision. Routine inspections behind the sink, paired with annual aerator maintenance and targeted cleaning around the base, ensure that the area around your primary water source stays as clean underneath as it appears on top.
