The Wired Ribbon Secret: Why DIY Bows Always Droop and How Pros Fix Them
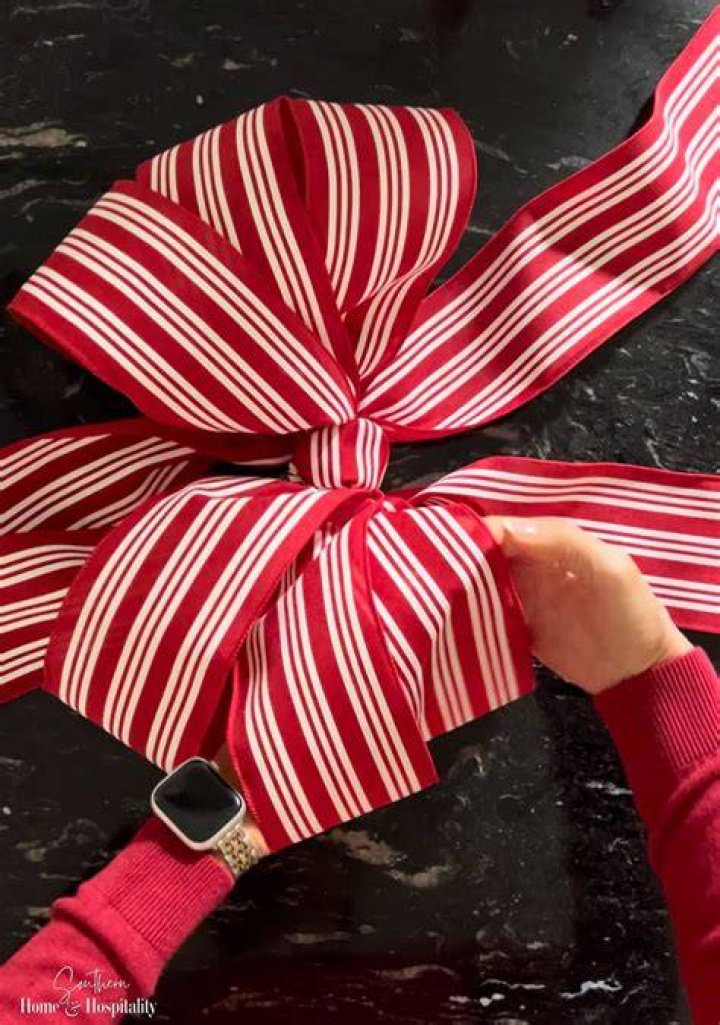
Every December, trash bins fill with crushed, misshapen ribbon that failed to survive its first winter storm. Homemade bows rarely look like the lush, gravity-defying arrangements on boutique displays; they sag forward, twist awkwardly, and lose their volume within days. The problem is rarely a lack of enthusiasm. It is a fundamental misunderstanding of tension, wire gauge, and fabric mechanics. As runway fashion revitalized architectural bow silhouettes, a cultural shift documented in the Grazia Daily UK Report tracking DIY bow construction from high fashion to home craft, home decorators have attempted to scale these shapes for interior styling with mixed results.
Achieving a high-end look comes down to specific structural habits rather than raw artistic talent. Analysis from seasonal home stylists at Ideal Home reveals that making budget greenery look expensive relies on scale, texture, and structural anchoring. When crafted properly, a bow does not merely rest on a wreath or tree; it anchors the entire visual line.
📌 Key Takeaways:
- The Center Anchor: Bow collapse happens because the binding point lacks mechanical compression, not because the loops are too large.
- The Material Threshold: Standard unreinforced ribbon fails outdoors; true structural resilience requires a high-density 2.5 inch wired ribbon held by metal wire rather than string.
- The Finishing Physics: Professional volume comes from systematic opposing-force fluffs and clean dovetail ribbon ends cut along the weave.
The Mechanics of the Droop: Why Craft Store Ribbons Collapse
Limp bows are the direct consequence of poor material physics. Crafters often buy sheer organza or paper-thin satin ribbons without checking the edge construction. Without an embedded structural core, broad fabric loops inevitably buckle under their own weight. Seasonal humidity compounds the issue. Moisture weakens natural fibers, causing unreinforced loops to droop into flat strips within 48 hours of outdoor exposure.
Professional florists rely exclusively on high-density wired edge ribbon. The interior wire, typically thin, coated copper or galvanized steel running inside stitched borders, acts as a flexible skeleton. This wire allows you to shape a loop into a self-supporting dome that resists rain, wind, and ambient moisture.
Fabric weight matters just as much as wire support. A lightweight polyester ribbon cannot sustain large loop diameters, even with wire support. For wreaths, mantels, and tree crowns, industry veterans reach for canvas, heavy dupioni, or velvet backed with structured webbing. If you plan to build a substantial multi-loop bow, the base ribbon must offer enough friction at the pinch point to keep the loops from slipping out of alignment.
The Twist and Fold Method: Securing the Center Loop Pinch
The foundation of any resilient bow is the twist and fold method. Most amateur bow makers make the mistake of folding ribbon back and forth like an accordion, which buries the design pattern and produces limp, flat layers. The professional technique requires establishing a tight center loop pinch that locks each layer under continuous mechanical tension.
Start by measuring an initial tail, then pinch the fabric between your thumb and forefinger. Form a small center loop, roughly two inches across. This inner ring conceals your wire mechanics. The critical maneuver happens immediately beneath this center ring: you must twist the ribbon 180 degrees. This half-turn forces the right side of the printed fabric to face outward for the subsequent loop while tightly packing the internal wire fibers at the focal joint.
Build alternating loops to the left and right, increasing each pair by roughly an inch in length. Maintain crushing thumb pressure on that central junction throughout the process. Every time you bring ribbon back to the center, twist it firmly before forming the next loop. This rotational tension packs the wires into a dense core. When you secure the assembly, the loops do not slide; they radiate out from a tight, rigid center.
Hardware Showdown: Selecting the Ideal Fastener
You cannot secure a structural bow with thread, household twine, or hot glue. Hand pressure alone cannot compress multiple layers of dense fabric tightly enough to keep them from shifting. Florists depend on specific binding hardware to cinch the central junction until the fabric indentations lock permanently together.
| Binding Hardware | Structural Hold | Best Application | Primary Vulnerability |
|---|---|---|---|
| 22-Gauge Green Floral Wire | High mechanical grip; crimps tightly with pliers | Outdoor greenery, wreaths, heavy velvet ribbon | Can cut through delicate sheer fabrics if over-tightened |
| Pipe Cleaners (Chenille Stems) | Medium grip; high friction prevents fabric slipping | Quick holiday swaps, banister swags, indoor decor | Core wire can fatigue and snap under severe wind |
| UV-Resistant Cable Ties (Zip Ties) | Maximum permanent locking tension | Giant commercial tree topper bows, exterior gates | Cannot be repositioned or reused once locked |
| Pro Bow Maker Peg Board | Standardized loop tension via wood pegs | High-volume production (10+ identical bows) | Requires flat table workspace; high initial setup footprint |
For standard home installations, 22-gauge floral wire strikes the ideal balance between raw tensile strength and flexibility. Thin 26-gauge wire often snaps under the torque required to cinch thick velvet. Meanwhile, pipe cleaners for bows offer an accessible, high-grip alternative. Their fuzzy chenille coating bites into slick satin, keeping the ribbon from sliding as you twist the wire tight.
Executing the Architectural Fluffing Technique
A bound bow looks like a collapsed, flat bundle of loops until you shape it. Shaping is where craft becomes architecture. The fluffing technique separates amateur work from commercial designs. If you simply tug on the ribbon without a plan, you will pull your carefully measured loops out of balance.
Hold the bound center firmly with your non-dominant hand. Slide the thumb and forefinger of your dominant hand inside the deepest loop closest to the base. Pull that loop upward while simultaneously pushing the adjacent opposing loop downward. You are not merely separating the loops; you are rotating the ribbon along its central axis to form an open, rounded dome.
Once you have arranged the loops in an alternating pattern, open each one individually. Insert your fingers into the ribbon tube and push outward against the wired edges. Curve the top of the loop upward and flare the sides. This simple outward pressure transforms flat fabric bands into hollow, three-dimensional cylinders that bounce back when compressed.
Scale and Applications: Wreath Bow Tutorial vs. Tree Topper Bow
Scale dictates technique. A compact design meant for an artificial holiday wreath will look lost at the top of a nine-foot Douglas fir, while an oversized tree crown will dwarf an 18-inch front door wreath.
Visual Scale Hierarchy
┌──────────────────────────────────────────────────────────┐
│ TREE TOPPER: 4-inch base ribbon + 2.5-inch accent │
│ (12-16 loops, 36-48 inch cascading tails) │
└────────────────────────────┬─────────────────────────────┘
│
┌────────────────────────────▼─────────────────────────────┐
│ MANTEL SWAG: 2.5-inch structured ribbon │
│ (8-10 loops, 18-24 inch trailing tails) │
└────────────────────────────┬─────────────────────────────┘
│
┌────────────────────────────▼─────────────────────────────┐
│ WREATH ACCENT: 1.5 to 2.5-inch wired ribbon │
│ (6-8 loops, 10-14 inch tailored tails) │
└──────────────────────────────────────────────────────────┘
For a balanced wreath bow tutorial setup, use a 2.5 inch wired ribbon cut to an overall length of roughly four to five yards. Aim for six to eight loops total, keeping the maximum loop diameter around four to five inches. This proportion leaves plenty of greenery visible around the perimeter while establishing a clear visual focal point at the bottom third or top dead center of the frame.
A tree topper bow requires a more robust approach. To keep the silhouette visible across a room, you need an expansive multi-loop bow built from 10 to 14 yards of material. Pair a heavy 4-inch structural ribbon with a coordinated 2.5-inch accent ribbon laid directly over it.
To anchor a large bow to the flexible leader branch at the top of a tree, skip pipe cleaners. Thread an 18-inch length of green floral wire or a heavy-duty cable tie directly through the back of the center junction. Cinch it tightly around the central trunk spike, then let four to six long tails cascade down the branches to draw the eye through the rest of the tree's ornaments.
The Finishing Flourish: Cutting Dovetail Ribbon Ends
Unfinished ribbon ends immediately undermine good design. Blunt straight cuts fray quickly, unraveling in outdoor humidity and leaving messy loose threads across your display.
Dovetail ribbon ends, also called a swallowtail cut, protect the fabric weave while giving the piece a finished, tailored look. Fold the ribbon tail in half lengthwise, matching the wire edges together evenly. Take sharp fabric scissors and cut at a clean 45-degree angle starting from the folded edge upward toward the wired outer edge.
When you unfold the tail, you are left with an inverted "V" pointing up toward the bow. The wired edges remain the longest points of the tail, allowing you to pinch, shape, and curl the fabric. Rather than letting the tails hang limp against the wall or tree branches, run your fingers down the wired borders to create soft, cascading waves that hold their shape all season.
Frequently Asked Questions (FAQ)
Q1: How much ribbon do I need for a standard 24-inch front door wreath bow?
A1: Plan on using four to five yards of 2.5 inch wired ribbon. This provides enough length for an eight-loop bow with a center loop, along with two 14-inch cascading tails that can be dovetailed without running short.
Q2: Why do the wire edges keep poking out of the ribbon when I make my cuts?
A2: Dull utility scissors often push the internal wire down the fabric channel rather than cutting through it. Use dedicated fabric shears. If a wire slips out, trim the wire core back by an eighth of an inch, then tuck the sharp tip back inside the seam to keep it from fraying or scratching surfaces.
Q3: How do I restore flattened wired bows after pulling them out of storage?
A3: Do not iron them; heat can melt synthetic fabrics and degrade the edge adhesives. Slide your fingers into each flattened loop and gently push outward against the wire edges to re-round the openings. Use a handheld garment steamer held six inches away to lift fabric creases, then reshape the loops as the material cools.
Design Standards for Seasonal Displays
Crisp, resilient seasonal decor comes down to understanding material structural limits. When you step away from limp craft string and embrace the mechanical stability of 22-gauge floral wire, high-density edge reinforcement, and directional twists, bow making shifts from a frustrating chore to a reliable styling skill. Master the basic physics of the central pinch, match your ribbon gauge to the room's scale, and your holiday displays will maintain their volume through winter winds and long months in storage.
